


Sourcing talent with the Programmable Search Engine (PSE)
Have you heard about the Google Programmable Search Engine (PSE)? Chances are that you have not, yet. And if you did, probably still a lot of mystery remains around it.
The PSE is one of the most underutilized tools in recruitment.
But it can be very powerful.
The PSE provides significant benefits compared to a standard or advanced Google search for talent.
What is the Programmable Search Engine
The PSE is a Google search engine that users can build themselves and customize based on search features like pre-set websites to search in, synonyms, default keywords and languages.
It is also commonly referred to as the Google Customizable Search Engine (CSE), which is the old name that Google used for it.
With a PSE you can build for an example your own search engine dedicated to searching in LinkedIn and Stack Overflow only, which only displays candidate profiles as results, that includes only people that work at pre-set companies and that uses preconfigured keywords that ranks the profiles with those keywords higher.
PSE’s can be shared with the world by making them public and optionally you can integrate them on your website.
Benefits of the PSE
Compared to a regular Google search, the PSE has a couple of important benefits.
- Advanced search features: A PSE offers more advanced search features than a regular Google search.
- Save searches: For searches that you do often you don’t have to start every new search from scratch because you can save the search including all the search parameters like websites, locations, keywords and for an example companies that you included.
- Share preconfigured search engines: Your team or clients can use the PSE to use the search intelligence you have incorporated without requiring them to understand complex search operators and settings.
- More keywords: You can use up to 500 search terms by making use of the synonyms search feature in a PSE. So you can overcome the limit of a regular Google search, which is 32 keywords.
- No CAPTCHAs: You don’t have to deal with the annoying CAPTCHAs that usually pop-up in a regular Google search, especially when you search repeatedly.
Cons of the PSE
Next to the fact that the PSE looks horrible, there are some other things to take in mind while starting out with the PSE:
- There is a limit of 10 results pages so you can get a maximum of 100 results per search
- For other users of the PSE than yourself it’s hard to see how the PSE was set up
- It has a bad design and inconsistent user experience
- Instructions on how to use the PSE are not very well documented
- Sometimes you just don't get the results you wished for and it's unclear why that happens
Once you get over these cons, the PSE can be a very powerful addition to your recruitment stack.
How to set up and use the PSE
This is a simple guide to start using a PSE. Using advanced (PSE) search features like schema.org types, meta data tags and Knowledge Graph Embeddings (KGE’s) are not covered here.
For an advanced read on PSE’s, we recommend reading the book Custom Search – Discover more: by Irina Shamaeva and others. This is one of the few reads that explains the PSE in detail.
The steps that follow now help you set up your PSE. This is an example so please note you can use other search parameters than stated here.
1. Go to https://programmablesearchengine.google.com
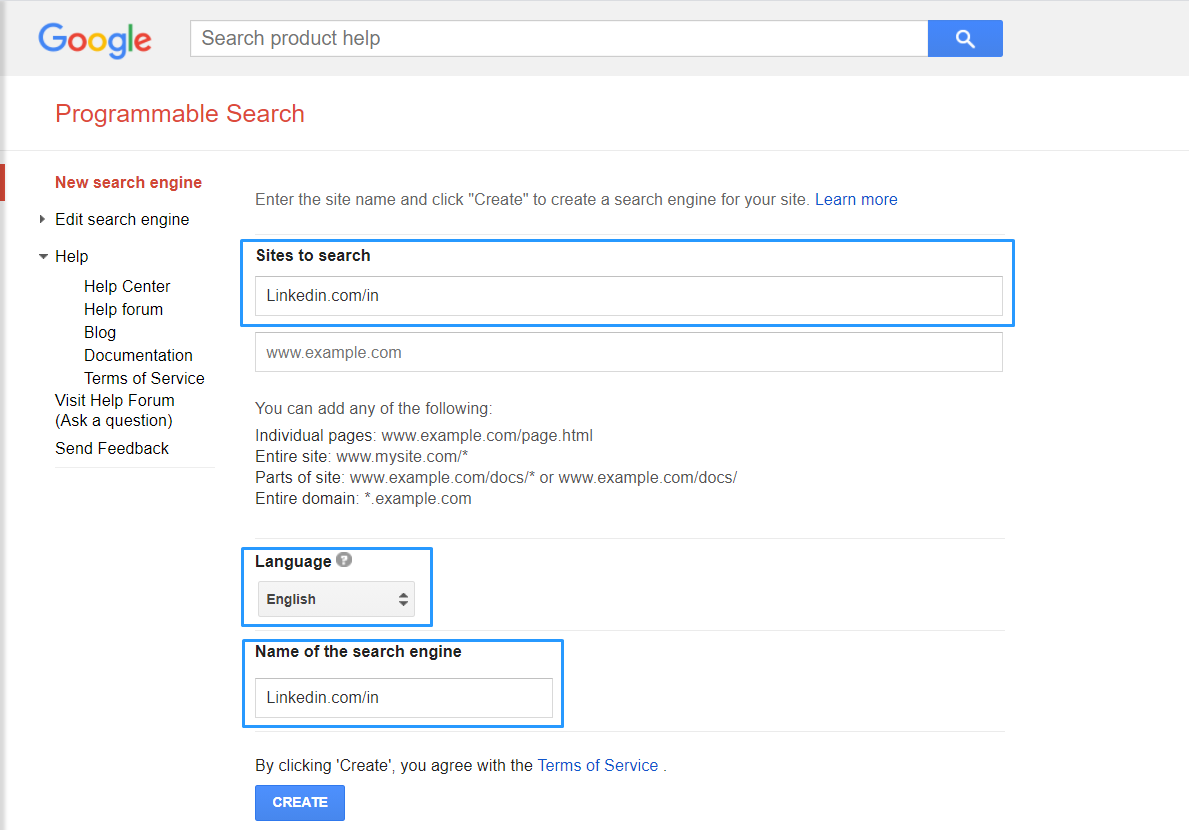
2. Add a new PSE

3. Add websites to search
Als set a language to search in and give the PSE a name. In this example we’re searching linkedin.com/in to include profiles only, so no other results like LinkedIn articles. You can also add a country code in front of the url to only search profiles of that country. Example for the United Kingdom is uk.linkedin.com/in
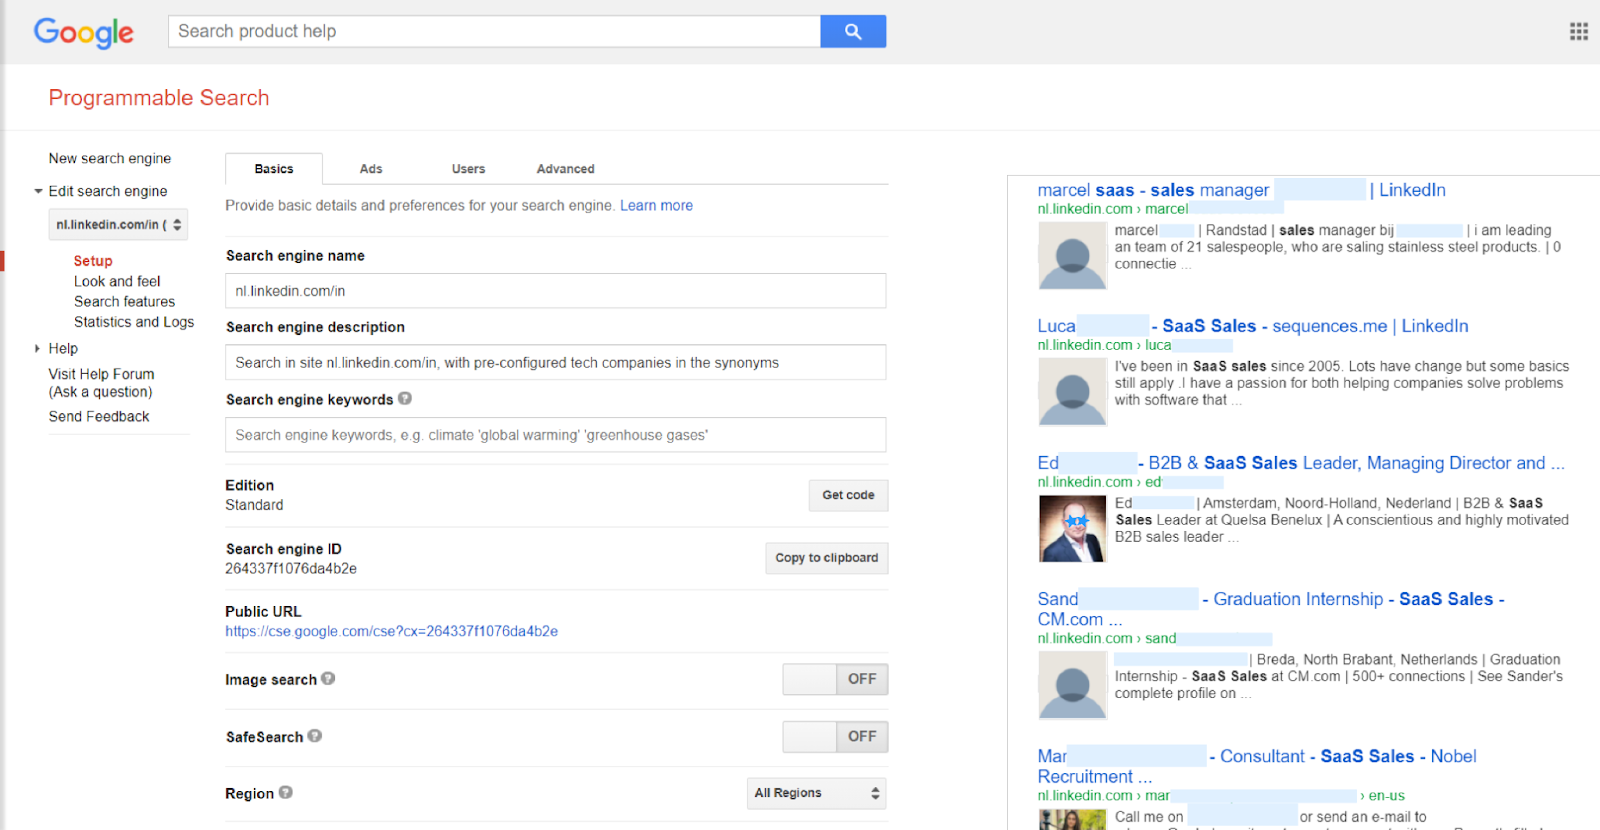
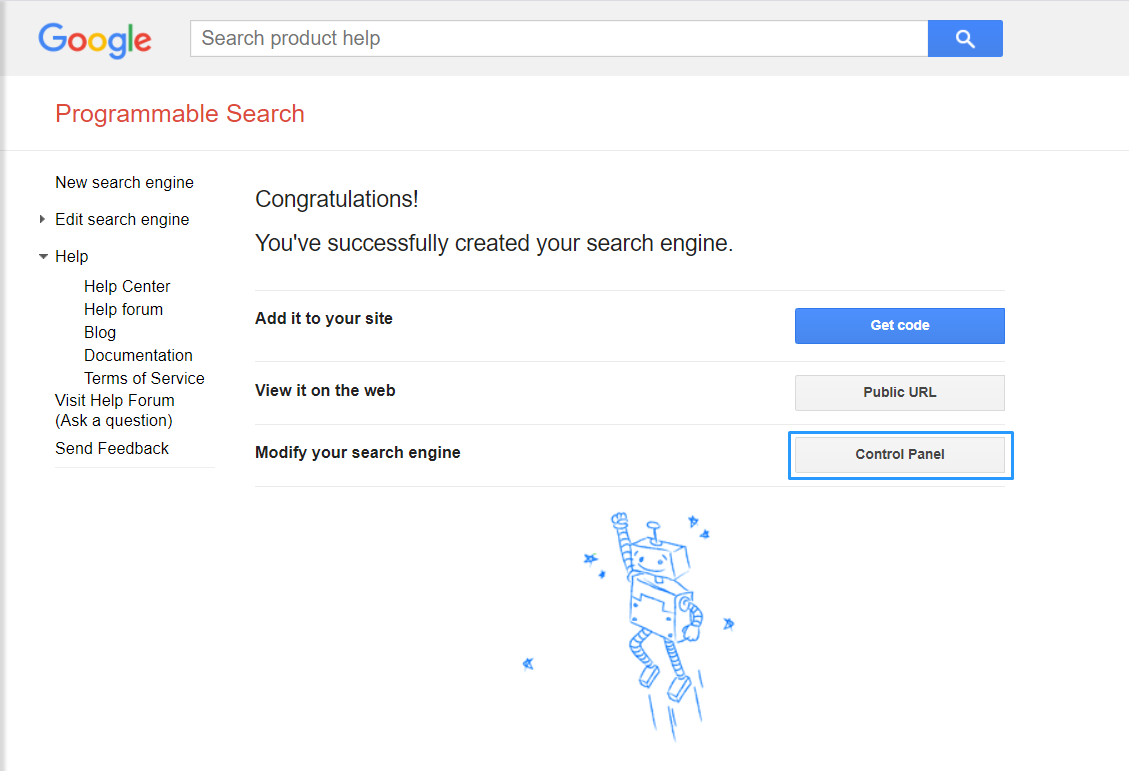
4. Go to the control panel to modify search features
5. Add search features
Add for example synonyms to include a list of companies you want your candidates to be part of. Note, adding synonyms doesn’t have to mean the words you include are actual synonyms. This becomes clear in the next step.
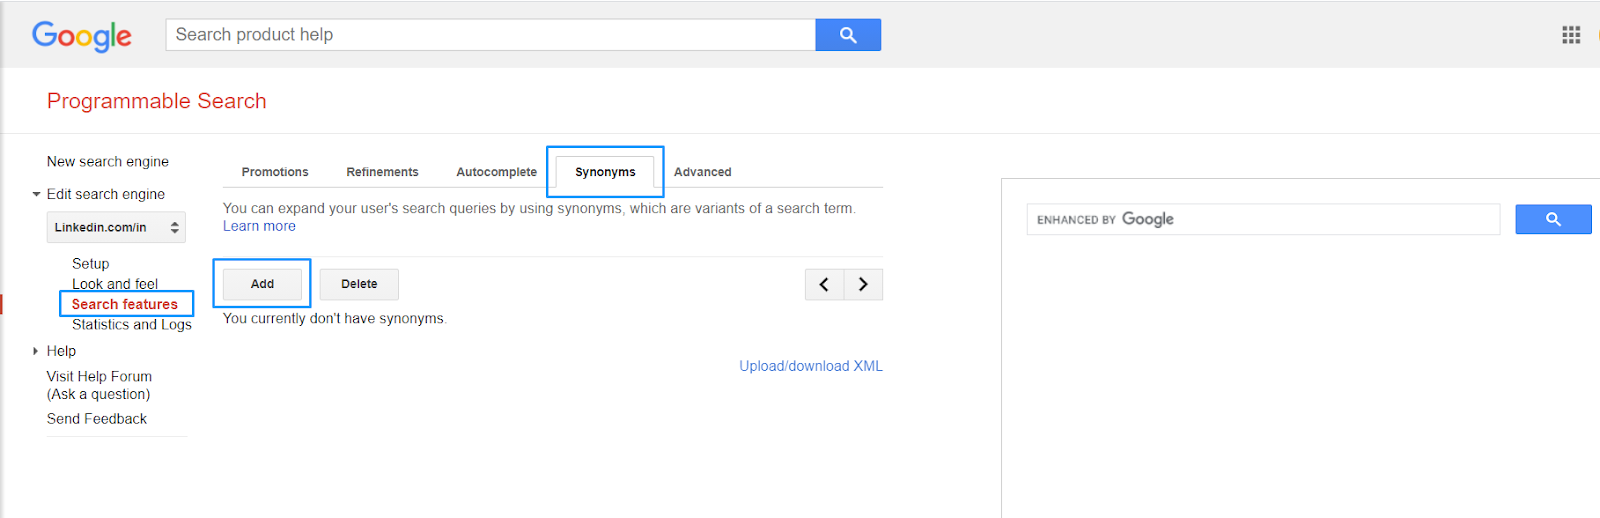
6. Add codes for synonyms
This can be anything. For example ‘X1’. But make sure it’s something that doesn’t actually pop up in candidates’ profiles. Add company names that you would like to search for (these could also be cities or universities for instance). In this example we search for people with Google, Amazon or Microsoft in their profile. The limit for synonyms is 500 in total and you can include a maximum of 10 synonyms (in this case companies) per search.

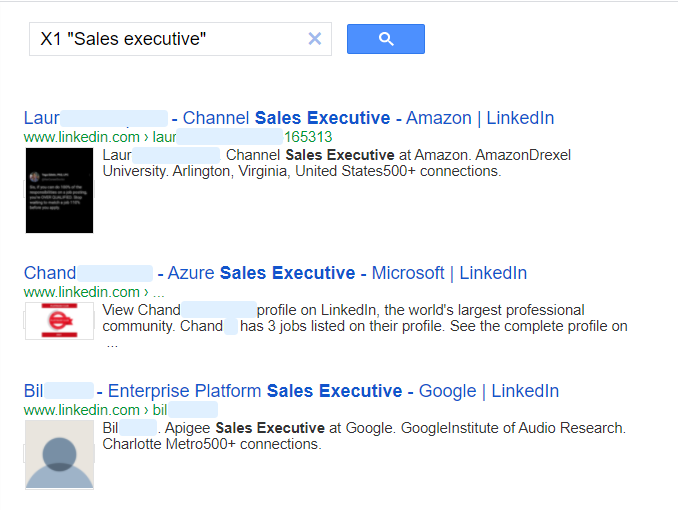
7. Include synonym codes
Go to your public url which you can find under ‘Setup’ on the left bar or test your PSE in the preview search box on the right. Include ‘X1’ in the search bar as this is the trigger to search for your included companies (Google, Amazon, Microsoft). Include the keywords for your search, in this case “sales executive”. You can add operators in PSE. Ignore the ads and find your candidates!
In conclusion
Hope you have found this helpful! Note that PSE’s are not perfect and sometimes frustrating with the dinosaur age look and feel. Also, there are many more scenarios and options to include in your search than we included in this guide, so try different things out.
We’re sure you can start finding candidates in a way you haven’t experienced before. It does take some practice and testing though.
Good luck!
Recruit talent on autopilot
Find and reach the best talent through billions of profiles with AI
Start for free